Guidance for litigants in person on compiling of ebundles for hearing in family courts
This guidance was updated in July 2026.
Electronic court bundles (e-bundles): a handy guide to Adobe Acrobat Pro and Adobe
For guidance on what is ‘a court bundle’ is, and what should go in it, please first read our Guidance for litigants in person on compiling of bundles for hearing in family courts.
This guide has been written on the assumption that you have already agreed with the other party what the bundle is to contain and there is an agreed bundle index.
If you are unsure of what should be contained in the index, it’s always possible to ask the other side and/or the court.
Note regarding parties in the specific case (may not be applicable to your case)
You may have been described in court or in correspondence/by the other party – who might have legal representation, as a ‘Litigant in Person’ [LIP]. This is a reference to a person who attends at court without a solicitor. Resolution would seek to refer to such a person as ‘the other person’ as, we note that there is no term which covers all possible scenarios. No disrespect is intended if the term used does not apply to you.
Step 1: preparation
Installing the software
You will firstly need to install or have access to a software program that enables you to create a bundle. This guide expressly refers to Adobe Acrobat Pro but there are many others available and which can be searched for and accessed online.
Please note that installation of any such program may come at a cost, so please do check in advance.
Documents to go into the bundle
You will need to make sure that you have all of the documents that are to be included within your bundle saved to your computer. You may have received the documents as scanned copies via email and/or be able to save/print documents as PDFs.
It is advisable to open a new folder in which to keep all relevant documents, or you can save them to your desktop.
Name each document clearly so you can identify what each is. You can do this by a right hand click and selecting the ‘renaming’ tab. You will also be able to rename documents at a later stage via Adobe Acrobat Pro.
Titles of documents should link to what it is labelled in the Bundle Index and if you number each one it will make it easier later on when making sure that they are in the correct order, eg Section A: Statement of Case (1), Section A: Chronology (2) etc.
Step 2: Creating a bundle
Open Adobe Pro. Your home page will look something like this:
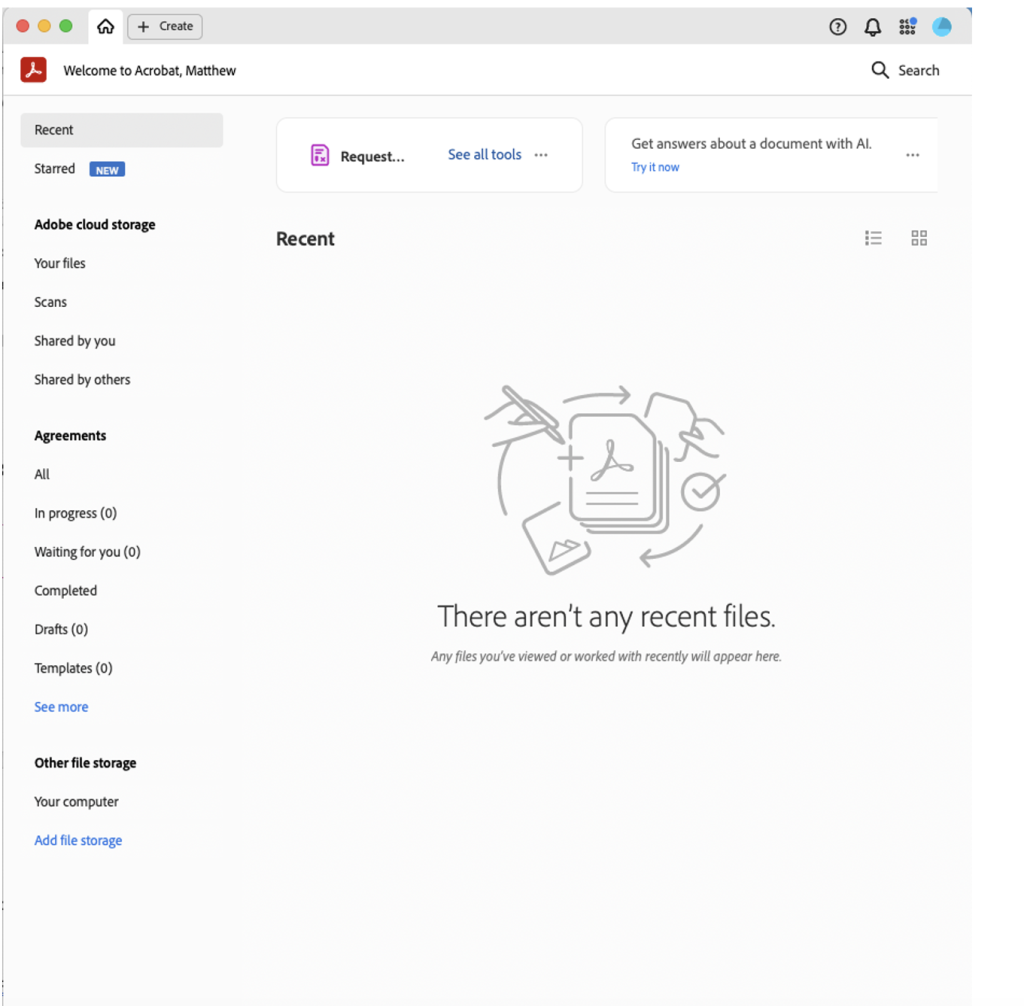
Note: At the top of the page will be a menu of tools. Your home page will likely display tools most frequently used but to the right hand side you will be able to access them all via the ‘All tools’ tab.
- From Tools select ‘Combine’.
- This will open up a new screen entitled ‘Combine files’.
- Select which of the documents displayed are to go into the bundle
- From here you can arrange documents into the right order. To move a document click on it and drag and drop it – this is where clearly labelling your documents is invaluable!
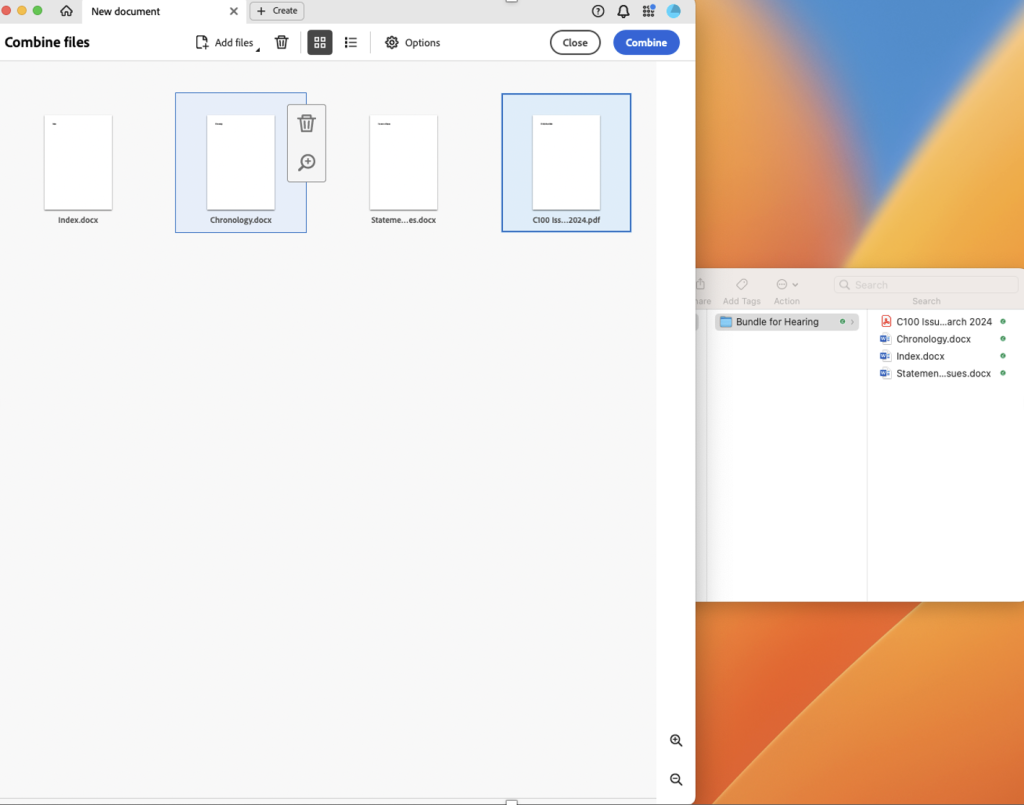
Note: From this page you are able to delete documents you do not need. You can either delete the whole document or, if it is several pages long, you can delete a specific page by clicking on the Expand button which will then display all pages within the document.
Remember that there are usually page count limits for bundles (350 pages is the usual permitted in final hearings) and so you will want to ensure that you are including documents that are relevant to your case. If the bundle you are compiling exceeds that page count you will need permission from the court to have more than 350 pages. Again, please see our Guidance for litigants in person on compiling of bundles for hearing in family courts.
From this page you can also move any documents if they are in the wrong order, by dragging and dropping them.

- When happy with the selected documents click ‘Combine’. This will open up a PDF of the bundle. This is your working draft.
- Save it to your computer either by closing it and clicking ‘Save’ or by clicking on ‘File’ and ‘Save’.
- If you are able to, it is preferable to create each section of the bundle in this way and then ‘Combine’ them to create a complete bundle.
Step 3: Getting documents in the right order
If the pages are in the wrong order you can correct this.
- Open your draft bundle.
- Return to your home page.
- From ‘Tools’ select ‘Organise pages’.
- To move a document click on it and drag and drop it.
- From this screen you can delete documents and/or pages within documents as described above.
Note: make sure that you are moving each document as a whole document. You should click on all pages to move them.
Step 4: Paginate (add page numbers) to the bundle
- Open your bundle
- Go to ‘Tools’
- Select ‘Edit’
- Click ‘Header/Footer’ and at the drop down select ‘Add’
- Click ‘Right Footer Text’ box
- Click ‘Insert Page Number’
- Numbering should run from the index to the end and should be in the bottom left hand corner
- Click ‘Save’
Step 5: Turn your bundle into a Searchable Digital File (OCR)
You will need to open Adobe.
You will also need to have saved a copy of your working draft bundle to your desktop.
Open your bundle to Convert to OCR
- From your home page go to ‘Tools’
- Select ‘Scan and OCR’
- This will open a different programme. The home page for which should look similar to this:
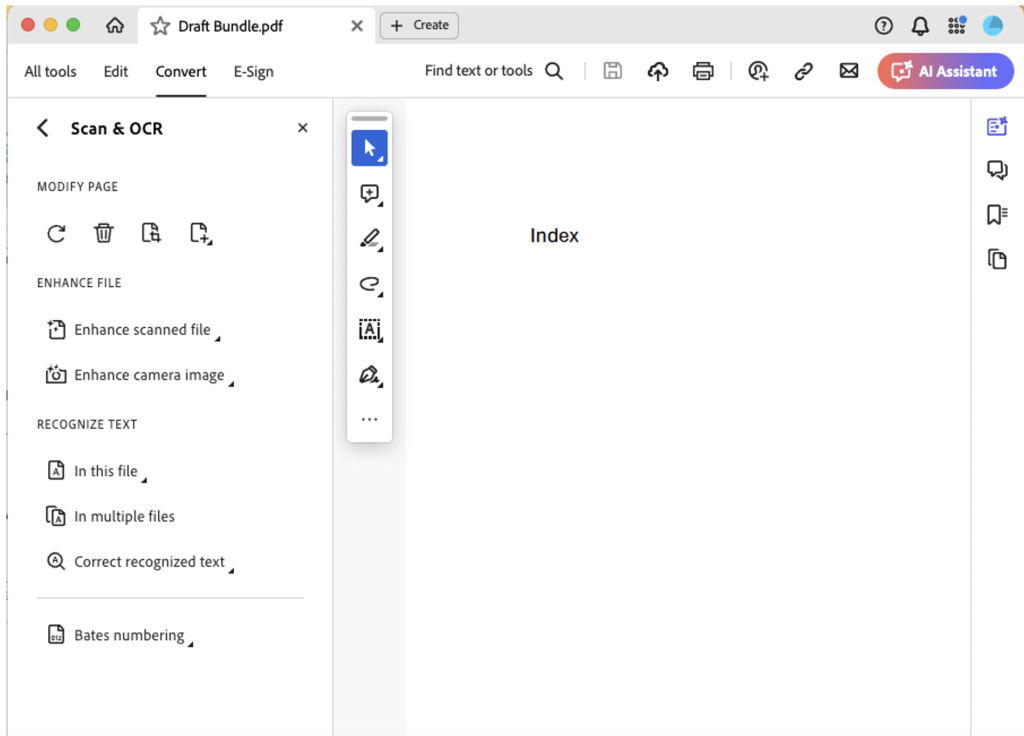
- Select ‘Recognise Text’ and at the drop down select ‘In this file’.
- Click on ‘Recognise Text’.
- When it has finished save the bundle
This process may take a few minutes.
Step 6: How to bookmark
It is advisable to bookmark your sections within the bundle.
- Open your working draft bundle in the Adobe programme
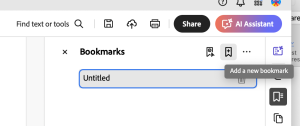
- On the right hand side is a toolbar running down the length of the page. Click on the ‘flag’ icon at the top
- Go to the page from which you want the bookmark to run from
- Select the flag icon +
- Name your bookmark, eg ‘Section A’ and then press the return button.

- Repeat until you have bookmarked all relevant sections/documents
- When finished, save the bundle by going to the menu at the top left hand corner and selecting ‘Save’
When you next open up a PDF of the bundle you will be able to navigate to the different sections via a ‘Table of Contents’. To access the Table of Contents go the top left hand corner and select the ‘Menu’ icon
You can ‘nest’ documents under headings by clicking on the bookmark and moving it to underneath the heading you want it to fall under. In the above example, the Chronology is ‘nested’ under the heading Section A. By right clicking on a bookmark, it is possible to change the style. In the above example, headings are in bold.